Pre-install Overwatch 2 Season 11 by downloading and installing the Battle.net app from Blizzard's website. Log in to your Battle.net account, locate Overwatch 2 in the app, and select the pre-install option if available. Monitor the download progress, ensuring sufficient disk space and a stable internet connection. Once the download completes, the game will install automatically. Enable automatic updates in the app settings to stay current with the latest version. After installation, you can launch Overwatch 2 directly from the Battle.net app and be ready to play when Season 11 goes live.
To pre-install Overwatch 2 Season 11, follow these step-by-step instructions:

Step 1: Install the Battle.net App
- Download the Battle.net App:
- Go to the Battle.net website.
- Download the Battle.net desktop app for your operating system (Windows or Mac).
- Install the App:
- Open the downloaded file and follow the installation instructions.
- Launch the Battle.net app once the installation is complete.
Step 2: Log In to Your Battle.net Account
- Create an Account (if needed):
- If you don’t have a Battle.net account, click on “Create a free Blizzard Account” and follow the prompts.
- Log In:
- Enter your email and password to log in to your Battle.net account.
Step 3: Locate Overwatch 2
- Find Overwatch 2:
- In the Battle.net app, locate the Overwatch 2 icon on the left sidebar. If you don’t see it, use the search bar at the top to find “Overwatch 2.”
- Select the Game:
- Click on the Overwatch 2 icon to go to the game’s page.

Step 4: Pre-Install Overwatch 2 Season 11
- Check for Pre-Installation:
- If pre-installation is available, there will be an option to download or pre-install the game.
- Start the Pre-Installation:
- Click the “Install” or “Pre-Install” button. Follow any on-screen instructions to begin the download process.
Step 5: Verify and Complete the Installation
- Monitor the Download:
- The Battle.net app will display the download progress. Make sure you have enough disk space and a stable internet connection.
- Complete the Installation:
- Once the download is complete, the game will automatically install the necessary files. You will be notified when the installation is finished.
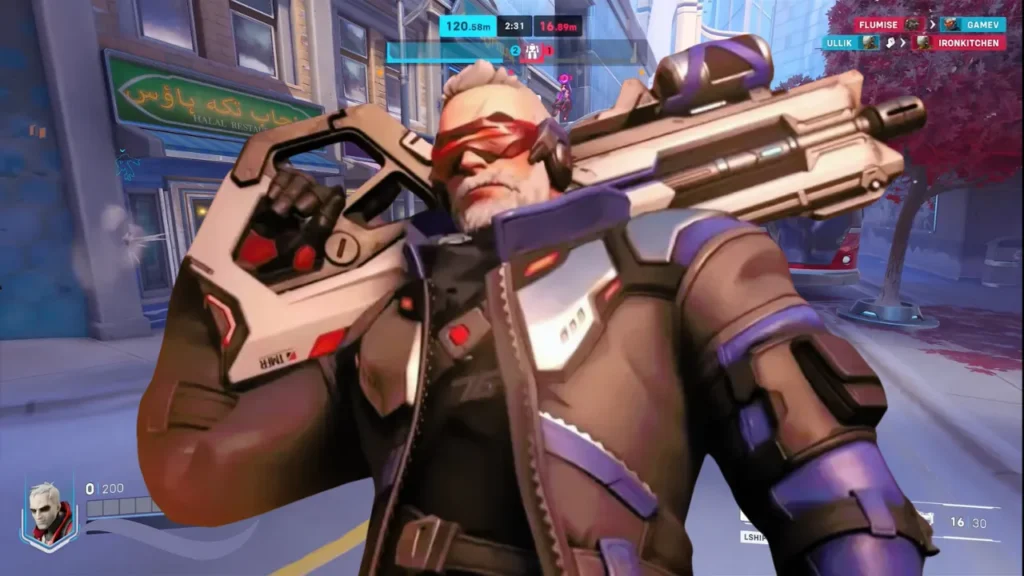
Step 6: Ready to Play
- Launch the Game:
- Once pre-installation is complete and Season 11 is live, you can launch Overwatch 2 directly from the Battle.net app.
- Update if Needed:
- Make sure the game is updated to the latest version before playing. The Battle.net app will handle updates automatically.
Additional Tips
- Enable Automatic Updates:
- In the Battle.net app settings, you can enable automatic updates for Overwatch 2 to ensure you always have the latest version installed.
- Check System Requirements:
- Make sure your system meets the minimum requirements for Overwatch 2 to ensure smooth gameplay.
- Join the Community:
- Engage with the Overwatch community through forums and social media to stay updated on the latest news and events related to Season 11.
If you want to know the details of every step then continue reading :

Download the Battle.net App
- Go to the Battle.net Website:
- Open your web browser and navigate to the Battle.net website.
- Select Your Operating System:
- On the Battle.net website, choose the appropriate version of the app for your operating system (Windows or Mac).
- Download the App:
- Click the download button to start downloading the Battle.net desktop app installer.
Install the App
- Open the Downloaded File:
- Once the download is complete, locate the installer file in your Downloads folder or the location you specified. The file will typically be named something like
Battle.net-Setup.exefor Windows orBattle.net-Setup.dmgfor Mac.
- Once the download is complete, locate the installer file in your Downloads folder or the location you specified. The file will typically be named something like
- Run the Installer:
- Double-click the installer file to open it. Follow the on-screen prompts to proceed with the installation.
- Follow Installation Instructions:
- On Windows:
- Click “Yes” if prompted by User Account Control to allow the installer to make changes to your device.
- The Battle.net Setup window will appear. Click “Continue” and then follow the prompts to complete the installation.
- On Mac:
- Drag the Battle.net app icon into the Applications folder when prompted.
- If prompted for your system password, enter it to authorize the installation.
- On Windows:
- Launch the Battle.net App:
- After the installation is complete, the Battle.net app should automatically launch. If it doesn’t, you can open it manually:
- On Windows: Click the Start menu, search for “Battle.net,” and click the app to open it.
- On Mac: Open Finder, go to the Applications folder and double-click the Battle.net app icon.
- After the installation is complete, the Battle.net app should automatically launch. If it doesn’t, you can open it manually:
You are now ready to log in to your Battle.net account and proceed with pre-installing Overwatch 2 or any other Blizzard games.

Verify and Complete the Installation
Monitor the Download
- Check Download Progress:
- Open the Battle.net app. Once you start the download for Overwatch 2, you will see a progress bar showing the current download status.
- Ensure Disk Space and Internet Connection:
- Make sure your computer has enough free disk space for the game. Overwatch 2’s size can be substantial, so ensure you have the required space available.
- Maintain a stable internet connection to avoid interruptions. A wired connection is preferable for consistent download speeds.
- Pause and Resume (if needed):
- If you need to pause the download for any reason, you can click the pause button. To resume, simply click the play button again.
Complete the Installation
- Automatic Installation:
- After the download is complete, the Battle.net app will automatically proceed to install the necessary game files. This process may take some time depending on your system’s speed.
- Notification:
- You will receive a notification within the Battle.net app once the installation is finished. You may also receive a desktop notification if you have enabled such notifications for the app.
- Verify Installation:
- Ensure that the installation process is completed without any errors. If you encounter any issues, the Battle.net app usually provides troubleshooting steps or prompts to repair the installation.
- Ready to Play:
- Once the installation is complete and you see the “Play” button, Overwatch 2 is ready to be launched. Click the “Play” button to start the game.

How to install Overwatch 2?
Step 1: Install the Battle.net App
- Download the Battle.net App:
- Visit the Battle.net website.
- Download the Battle.net desktop app for your operating system (Windows or Mac).
- Install the App:
- Open the downloaded file and follow the installation instructions.
- Launch the Battle.net app once the installation is complete.
Step 2: Log In to Your Battle.net Account
- Create an Account (if needed):
- If you don’t have a Battle.net account, click on “Create a free Blizzard Account” and follow the prompts to register.
- Log In:
- Enter your email and password to log in to your Battle.net account.
Step 3: Locate Overwatch 2
- Find Overwatch 2:
- In the Battle.net app, locate the Overwatch 2 icon on the left sidebar. If you don’t see it, use the search bar at the top to find “Overwatch 2.”
- Select the Game:
- Click on the Overwatch 2 icon to go to the game’s page.
Step 4: Install Overwatch 2
- Install the Game:
- Click the “Install” button on the Overwatch 2 game page.
- Choose your preferred installation location if prompted.
- Confirm the installation and start the download process.
Step 5: Monitor the Download and Installation
- Check Download Progress:
- The Battle.net app will display the download progress. Ensure you have enough disk space and a stable internet connection.
- Complete the Installation:
- Once the download is complete, the game will automatically install the necessary files. You will be notified when the installation is finished.
Step 6: Launch Overwatch 2
- Launch the Game:
- After the installation is complete, click the “Play” button in the Battle.net app to launch Overwatch 2.
- Update if Needed:
- Ensure the game is updated to the latest version. The Battle.net app will handle updates automatically.
By following these steps, you can successfully install Overwatch 2 and start playing.

How to play Overwatch 2 pre-release content?
To play Overwatch 2 pre-release content, such as beta versions or early access content, follow these steps:
Check for Availability
- Visit Official Sources:
- Check the Overwatch website or Blizzard’s news page for announcements regarding pre-release content, beta tests, or early access opportunities.
- Sign Up for Beta Access:
- If a beta test is announced, sign up for it through the official channels. This might involve logging into your Battle.net account and opting into the beta from your account settings or the Overwatch 2 game page.
Receive Beta Invitation
- Check Your Email:
- If selected for beta access, you will receive an email from Blizzard with instructions on how to access the pre-release content. Ensure you check the email associated with your Battle.net account.
- Access Beta via Battle.net:
- Log into your Battle.net account. If you are selected for the beta, the Overwatch 2 beta should appear in your game library.
Install the Overwatch 2 Beta
- Locate the Beta:
- In the Battle.net app, find the Overwatch 2 icon. If the beta is available, there will be an option to install the beta version of the game.
- Install the Beta:
- Click on the Overwatch 2 beta icon and then click the “Install” button.
- Follow the installation instructions and monitor the download progress.
Play the Pre-Release Content
- Launch the Beta:
- Once the installation is complete, click the “Play” button to launch the Overwatch 2 beta.
- Provide Feedback:
- Participate in the beta testing by playing the game and providing feedback through the channels provided by Blizzard, such as forums or feedback forms.
Additional Tips
- Stay Updated:
- Keep an eye on official Overwatch social media channels, forums, and the Battle.net launcher for any updates regarding pre-release content.
- Prepare Your System:
- Make sure your system meets the minimum requirements for Overwatch 2 and that you have enough disk space for the beta installation.
By following these steps, you can access and play Overwatch 2 pre-release content and contribute to the game’s development through your feedback.

How to preload Overwatch 2 Invasion?
To preload Overwatch 2: Invasion, follow these steps:
- Open Battle.net: Launch the Battle.net application on your computer. If you don’t have it installed, you can download it from the official Battle.net website.
- Log in to Your Account: Enter your Blizzard account credentials to log in. If you don’t have an account, you will need to create one.
- Locate Overwatch 2: In the Battle.net app, go to the “Games” tab and select Overwatch 2 from your library. If it’s not already in your library, you can search for it in the store section.
- Click on the Preload Button: Once you have selected Overwatch 2, look for the preload button. It should be available a few days before the official release of the Invasion update. Click on this button to start the preloading process.
- Ensure Enough Storage Space: Make sure you have enough storage space on your hard drive for the preload. The required space will be indicated before you start the download.
- Download the Preload: The preload will begin automatically. Allow it to download fully so you are ready to play as soon as the update goes live.
- Check for Updates: Occasionally, Blizzard might release patches or updates after the preload. Check back on the Battle.net app before the launch to ensure you have the latest version.
Additional Tips:
- Stable Internet Connection: Ensure you have a stable internet connection during the download to avoid interruptions.
- Automatic Updates: Enable automatic updates in the Battle.net settings to make sure your game is always up-to-date.
For the latest updates and detailed instructions, you can refer to the official Overwatch website and the Blizzard support page.
Your game is ready to play the moment the new content goes live. By following a few simple steps, you can preload the update via the Battle.net app, guaranteeing you won’t miss a second of the action when the servers open. This preparation allows you to dive straight into the new adventures, maps, and heroes without delay.
With everything set up in advance, you can experience the excitement and challenges of Overwatch 2: Invasion as soon as it launches, enjoying a seamless and immediate start to your gaming session. Get ready for an immersive and thrilling experience, perfectly set up and ready to play.


Leave a Reply